We know how much wood fillers play important roles in wood restoration, but can you screw into wood filler? This post will answer the question. Please read on…
We have multiple instances where you need to repair woodwork and wood fillers is a compound that will constantly be mentioned in the process.
The fillers help fix wood splits, cracks, and holes. Sometimes, you will be forced to screw the filled area to maintain the surface’s integrity.
Such instances take us back to our question, can you screw into wood filler?
You can screw into a wood filer. However, ensure that your filler dries before you consider screwing through it.
Secondly, ensure that the screws you use are small and effective. Using large screws would stress destroy the dimensional strength of your wood filler.
So, it is important to get it right with the screwing of the wood filler. Epoxy wood fillers for example hold screws very well but watch out for the stress applied to the compound.
This article answers a lot of your questions regarding the screwing into wood fillers. Keep reading for more insightful discussion on the subject.
Table of Contents
What Is Wood Filler?
 Wood fillers are sandable compounds in a hardening resin that can soak into and bond with wood fibers.
The ancients mixed wood dust with varnish, glue, or lacquer to create wood filler.
Conversely, contemporary brands combine wood fibers with limestone, attapulgite, or gypsum in water or solvent-based hardening resin.
Wood fillers feature three defining qualities: they are sandable, sustainable, and cure to deliver a hard surface.
In addition, fillers with natural wood fibers stain better than those with higher mineral content.
But generally, most pastes are porous enough to receive paints and stains.
We also have wood grain fillers that you can spread on flat interior surfaces, like countertops and tabletops.
Moreover, you only need to apply the product with a putty knife and then sand it before adding the finish.
Wood fillers come in handy in various applications. They include:
- Wood filler fills scratches, gouges, and nicks in unfinished surfaces.
- It fills holes and gouges in lumber flooring, especially for hardwood floors.
- The paste molds and shapes damaged edges on countertops, tabletops, and shelves.
Consider one-part wood fillers for interior use and two-part formula for both outdoor works.
Further, the latter works well for indoor projects. It has a hardener that turns the product into a rock-hard surface.
Thus, you can drill the wood without ruining it.
Two-part fillers are also similar to wood putty. They are non-porous, dense, and sometimes unstainable.
However, they still allow you to sand the surface for a smooth result.
The wood does not have to be damaged to require a wood filler. Sometimes, the surface has a wide grain.
In addition, the filler conceals nails and screw heads on the lumber. As a result, your workpiece looks presentable.
Wood fillers are available in different types and colors to accommodate various wood types.
Also, getting the correct wood filler is crucial as only certain types accommodate drilling. Check out standard products to consider.
-
Simple Wood Filler
You can create a simple wood filler from sawdust and carpenter’s glue. However, ensure that the sawdust is from the same wood as the workpiece.
Other homemade wood fillers are linseed and ground limestone or chalk.
Further, although these fillers are quick and easy to fix, they are lower quality than commercial ones.
Therefore, it is prudent to use them sparingly.
-
Two-Part Epoxy Wood Fillers
Epoxy wood fillers comprise hardeners and resins to deliver hard and durable fillers. Moreover, they get the name ‘two-part’ from the application technique.
First, you apply an undercoat. Then, you add a second layer for added efficacy.
The product is incredibly stable after drying. Also, it does not expand or shrink after application.
Epoxy fillers deliver a hard and workable surface, allowing further applications like staining and painting.
In addition, they cure quickly and protect the wood from moisture and insect damage.
This wood filler is your go-to product if you want to drill the wood. Besides, it can comfortably hold screws and nails.
-
Exterior Wood Fillers
An exterior wood filler comes in handy for wood exposed to elements. It is waterproof and holds polishes, paint, and stain.
Also, you can drill the product and expect it to hold fasteners in place.
-
Multi-Purpose Wood Fillers
The wood filler comes with multiple benefits. It is similar to the exterior and two-part epoxy fillers.
The product dries very quickly and does not fail on outdoor wood. Further, you can even apply them in the winter.
Multi-purpose wood fillers are available in various colors.
Besides, they allow staining, painting, and polishing to accommodate the woodworker’s preferences.
Finally, you can drill into the product and use fasteners to secure your workpiece.
What Is Deck Screw?
Deck screws refer to threaded fasteners designed for decks. They have a head, a shank, and a tip.
You’ll find a recess for specific bits, such as the Philips head bit.
The deck screws are sturdier than wood screws and are from copper or stainless steel. In addition, their corrosion-resistance qualities make them suitable for exterior use.
Conversely, wood screws are primarily from steel. Also, they feature a flat head and an unthreaded shank.
Deck screws deliver optimal efficiency and effortless bonding.
Further, they differ from drywall screws that feature fine or coarse threading.
A coarse thread drywall fastener has fewer threads and more space between threads than a fine one.
Consequently, coarse threads are more challenging to remove than their counterparts.
Primary parts of a deck screw include:
-
Head
The screw’s head is the visible area on the fastener. Moreover, it is the part you see after installation.
The head’s shape and style vary depending on the screw’s material and application.
-
Shank
A shank is the unthreaded screw part between the thread and the head. It also denotes the fastener’s thickness and width.
This part has two functions. First, it allows the screw to pull materials together.
Next, it keeps the fastener from overheating, preventing snapping or breaking.
-
Drive
The drive is within the screw’s head and determines the driver bit to use.
Consequently, the more engaged the drive, the less prone it is to slipping or stripping during installation.
-
Tip
This part helps the screw penetrate the material. It also reduces the need to drill pilot holes.
In addition, you will need minimal torque to install the fastener, thus decreasing wood splitting chances.
-
Thread
The thread is the spiral or helical section running around the screw’s body. It drills into the lumber fibers and tightens to deliver a secure connection.
Some screws, such as composite decking screws, have more reverse threads to pull the material downward.
In addition, they prevent the board from mushrooming.
Also, deck screws come in various head styles to accommodate multiple projects. They include:
- Flat and Bugle Head. These screws work best in general construction and structural applications. However, ensure the head sits flush with the surface or sinks deeper into a counterbore.
- Truss Head. The screw has an extra broad and slightly rounded head. It is perfect for securing thin, one-ply materials and applications needing a larger hole.
- Trim Head. This accessory is suitable for installing fascia boards and finishing trim. Also, it has a more unobtrusive appearance while offering superior holding power.
- Hex Head. These fasteners are easy to identify as they have a hexagonal head. In addition, they feature a built-in washer to distribute the weight load.
- Cap head. The screw has a taller head to penetrate rigid deck boards. Also, it has a reverse thread to minimize mushrooming.
Advantages of Deck Screws Include:
- The fasteners have a flare or a bugle shape preventing them from sinking into the lumber. Thus, you minimize cracking and splitting risks.
- The well-tempered threading and an aggressive tip allow for easy use, increasing efficiency during handling.
- Deck screws are suitable for holding heavy wood pieces.
- They can withstand salty, humid, and rainy conditions without rusting.
Can Wood Filler Hold a Screw?
Wood filler can hold a screw. However, it is prudent to ensure the product cures well before screwing.
In addition, wood fillers cannot hold heavy loads or stress. They only accommodate small screws.
Further, heavy loads and stress destroy the wood filler’s dimensional strength.
The product has excellent flexibility to accommodate screwing and drilling.
However, a wood filler is not ideal for filling a hole stripped out of a screw or in a hinge mortise.
Otherwise, it’ll be like filling lumber with incompatible wood particleboard that cannot hold a screw.
Use toothpicks, wooden match sticks, or bamboo skewers for stripped-out or hinge mortise screw holes.
Also, soak the materials in lumber glue and jam until they fit the gap. Then, set them deep into the material.
Nonetheless, it is okay to use wood filler when filling small cracks and holes.
Besides, most products hold screw wells, and there are multiple options to meet your project needs.
Can You Drill Wood Filler?
It is possible to drill wood filler. Only ensure it fully cures for a better result.
Moreover, multi-purpose and two-part epoxy wood fillers prevent cracking during the drilling process.
But consider the hole’s depth when drilling the wood filler. Otherwise, if it is too deep, you may ruin the project.
In addition, it is essential to know how deep the hole should be to hold the fastener tightly.
Use a quarter inch for extensive hardwood pieces like oak and a half inch for medium-firm lumber like Fir.
Also, consider ⅝ inches for medium firm lumber like cherry and one-inch softwoods like cherry.
Before drilling into the wood filler, it is essential to know how to use it. Below is a brief procedure.
- Get the correct supplies, including sandpaper, wood filler of choice, putty knife, sealer, tack cloth, shop vacuum, and paint or stain. Luckily, this equipment is available in most lumber stores and hardware.
- Next, prepare the wood before using the filler. Remove loose lumber chunks, paint, or stain around the area.
- Sand rough edges around the area you’re filling. Then, use a moistened tack cloth or shop vacuum to remove debris.
- Let the wood cure before moving on to the next step.
- Use the putty knife to apply the wood filler. Begin with the surface edges and press the paste into the area.
- Slightly overfill the gaps in case the product changes shape or shrinks during drying.
- Give the wood filler enough time to cure and set for the best outcome. Usually, you need from 20 minutes to a few hours. So, do not rush the process.
- Sand the filler to align it with the surrounding surface or to deliver your desired look.
- Finish the surface with polish, stain, or paint. This step is not a must, but it is essential.
Wood Fillers that You Can Screw Into
We have various wood filler solutions for your project. Furthermore, the formula may comprise water, latex, epoxy, or oil.
Thus, get the best for your application.
For example, consider an epoxy-based formula when you want to sand and paint the surface. Or go for an oil-based product for weathered and older lumber.
Moreover, water-based fillers are suitable for exterior and interior painting projects.
Recommended wood fillers include:
-
Minwax 12-Ounce High-Performance Wood Filler
 Consider this wood filler for both professional and DIY lumber repairs. Also, it works magic on damaged wood needing restoration or minor repairs.
The filler is easy to drill into, sand, plain, and nail. But ensure it dries thoroughly before handling.
Besides offering superb security, the product is also weather-resistant.
Minwax 12-Ounce is a two-part formula for filling holes, gouges, or large cracks.
Thus, you’ll deliver a successful outcome whether the holes are from birds and animals, or the wood trim damage is from a water pipe burst.
You can also use the product secure two non-lumber materials, like concrete, fiberglass, ceramic, and metal.
-
Abatron WoodEpox Replacement Compound
 Abatron WoopEpoxy comes in a two-quart repair kit and is excellent for extensive home renovation applications.
It has a hardener and resin paste that you combine for superior wood repair.
The compound is a lightweight filler for trimming, molding, and painting. It also hardens quickly in one to two hours.
This product does not shrink and can withstand various weather conditions.
Therefore, you can use it for interior and exterior wood repair solutions.
Abatron Formula is ideal for rebuilding extensive wood sections like furniture, window frames, doors, and other structural elements.
-
FamoWood Latex Wood Filler
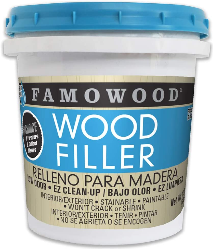 This fast-drying formula delivers professional results for cabinet makers and furniture restorers.
Further, your search has ended if you’re a home DIY looking for quality wood repair solutions.
FamoWood Latex has wood flour, making it consistent with the lumber’s texture. You can also nail, plane, sand, drill, stain, or paint the surface after 20 to 30 minutes.
The product comes in ten colors to accommodate various lumber grains and textures.
In addition, it dries evenly and smoothly without shrinking, cracking, or crumbling.
-
Elmer’s Carpenter’s Wood Filler Tube
 This glue works perfectly on minor repair projects.
Further, it is perfect for repairing small gaps, dents, holes, and other scratches on trim, walls, floorboards, and other lumber surfaces.
A primary benefit of this product is its drying time. It cures hard and fast; thus, you will not hold workpieces in place for long.
Elmer’s Carpenter Wood Filler resists shrinking and cracking. In addition, it securely holds screws and anchors.
You’ll be happy to note that the filler is sandable after drying. Thus, staining or painting is possible.
Lastly, the solvent is water-based and easy to clean up. You can also re-wet the product if it dries during application.
-
J-B Weld Wood Epoxy Adhesive
J-B Weld Wood Epoxy is fast setting and ideal for heavy wood repair projects.
Further, it sets within five to seven minutes and cures completely in one to three hours.
The formula does not crack or shrink during drying. Instead, it forms a hard-rock surface with a 1700 PSI tensile strength.
After drying, you can file, nail, stain, and paint the filler.
Also, it works excellently on extensive and small workpieces: thus, accommodating multiple repair applications.
-
3M Bondo Home Solutions Wood Filler
 This high-quality formula delivers a professional-looking surface regardless of the repair project.
It dries in less than 30 minutes. Also, once it dries, you can paint, saw, sand, and nail the surface.
3M Bondo is a permanent filler accommodating staining.
In addition, it features a low-viscosity index, meaning it penetrates deeply to deliver a solid surface.
The formula is also non-shrinking, incredibly durable, and works well in fixing damaged and worn-out lumber.
How to Apply Wood Filler to Hold a Screw?
Generally, epoxy and multi-purpose wood fillers are the best products to screw into.
Besides, the process is relatively straightforward and involves two exercises:
- Applying the wood filler
- Driving in the screw
Applying Wood Filler to Hold a Screw
The application technique significantly influences the project’s success.
You can get away with imperfections when using wood fillers as ‘cosmetics’ to mask flaws. But screws require you to apply the filler properly to guarantee a durable outcome.
The materials needed for the process include:
- Multi-purpose or epoxy wood filler
- Sandpaper
- Scraper
- Lint-free cloth
- Paint or stain
- Putty knife
Next, follow the steps below:
-
Prepare the Wood
The first step is to prepare the lumber to ensure the filler bonds properly. Then, scrape off loose wood stains and paint and remove splinters.
The wood must give a smooth and finished feel before you proceed.
-
Sand Rough Edges
Smooth out rough wood edges with sandpaper after removing loose chunks and splinters.
Use a shop vacuum to eliminate the resulting debris and wood dust.
Remember, wood dust can hinder the filler’s adhesion qualities. Therefore, ensure you work in and around the workpiece.
Do not worry if you do not have a shop vacuum. Wiping the surface with a wet tack rag works well too.
Also, you do not have to sand down rough edges. Proceeding to apply the product will still give a satisfactory surface.
However, sanding the wood makes the work more manageable.
In addition, you guarantee a smooth, professional finish.
Lastly, please wear a construction mask, as prolonged exposure to sawdust causes nasal cancer.
-
Apply the Wood Filler
Mix the hardener and epoxy resin as advised by the manufacturer.
Apply the solution with a putty knife. And start from one end, gradually working to the opposite end.
Further, press down the knife to soak the filler deep into the surface. The exercise also ensures you have no trapped air.
Please note that trapped air compromises the filler’s durability and strength. As a result, it won’t hold screws firmly.
Overfill the holes to allow shrinkage as the epoxy hardens. In addition, you can level the wood with sandpaper if the epoxy does not shrink.
-
Let the Wood Filler Dry and Cure
Allow the filler to dry to the touch. Usually, manufacturers indicate the recommended minimum duration for easy handling.
Once you confirm the surface is dry, sand the excess formula and paint it as desired.
The other step is to add screws.
-
Driving In the Screws
We have two primary instructions when adding the wood screws.
- Utilize small and lighter load-bearing screws.
- Create pilot holes before screwing.
-
Utilize Small and Lighter Load Bearing Screws
Remember, multi-purpose and epoxy wood fillers are not natural wood products, despite their durability and strength.
Therefore, it is prudent to drive screws gently to avoid destroying the project’s structure.
Also, ensure the fasteners do not bear heavy loads, like bed frame brackets and door hinges.
These structures are pretty heavy and would overwhelm the screws. Hence, they will soon crumble.
Nonetheless, the wood screws will work perfectly for small and lighter loads.
-
Create Pilot holes
It is advisable to make pilot holes before driving in the screws. However, only do it after the product dries to the touch.
A pilot hole is a smaller hole drilled into the wood before inserting the screw.
The hole guides the screw, allowing it to penetrate the wood more easily. Further, you’ll avoid damaging the wood or the screw.
We have two primary screw types: self-tapping and self-drilling. Also, although the products differ, most people use their terms interchangeably.
Self-tapping screws have threads running down the fastener’s length. And self-drilling screws have drill bit-shaped ends.
Self-tapping screws require pilot holes as they cannot penetrate hardened wood fillers.
Conversely, you can drive in a self-drilling screw without pilot holes. But you risk splitting or cracking the wood.
Here’s How to Apply Wood Filler:
Basic Guidelines for Handling Wood Filler for Screwing
They include:
-
Examine the Wood Filler’s Condition
Sometimes, you may have wood filler on the shelf for a while. Hence, it is prudent to confirm the product is still useable.
Discard the formula if it does not mix up well or if you see dry parts. In addition, a rancid smell indicates contamination.
-
Please Avoid Overdoing the Wood Filler
It is tempting to overload the gap with filler and then sand off any surplus after drying.
But the product may harden rock-solid and pose an enormous task to smooth.
For example, when filling softwoods like pine, a filler may become stronger than the wood. Thus, it’d be challenging to sand the surface.
Exercise caution when applying the product and be conservative. You can always add more filler if it shrinks after drying.
-
Remove Dust and Debris Before Using the Filler
Use a shop vacuum to remove huge dust amounts. Then, get a tack rag to eliminate fine dust films.
A tack cloth is a wax-coated, sticky cheesecloth designed to clear fine dust from wood.
However, do not press it too hard.
Otherwise, you might fix the wood with the rag’s wax, necessitating more sanding rounds.
-
Pre-color the Wood Filler, Where Necessary
Sometimes, seasoned woodworkers pre-color the filler. This way, it blends better with the wood finish and delivers a uniform outcome.
Fortunately, you can mix the filler with a wet stain and expect a professional surface.
But the process needs some experimentation as wood fillers absorb the stain differently.
For instance, use a dark stain when making the wood filler darker.
Also, get a water-based stain for water-based fillers and solvent-based formulas for petroleum ones.
-
Keep the Area Warm
Please keep the project in a warm environment during the wood filler application.
The generated heats speed up the drying duration. This way, you’ll only need 15 to 20 minutes as
Position the workpiece under the sun. Or use a hairdryer to fasten the drying process for areas with limited or no sunlight.
The process removes moisture trapped in the filler.
Moreover, the surface should not feel tacky after drying. Instead, it should be relatively hard if you try to scratch it.
Is Wood Filler as Strong as Wood?
Wood Filler is not as strong as wood. But it contains natural lumber fibers to deliver a sturdy project.
In addition, sawdust suspended in a binder, either petroleum or water-based, cures into a hard finish.
However, the formula will not add any structural strength to the lumber.
Frequently Asked Questions
Some of the most asked questions include:
-
Why Are Wood Fillers Not Load-bearing?
Generally, wood fillers steadily hold nails and screws. But they easily collapse under heavy loads.
The product does not support large screws as heavy loads and stress destroy it. For instance, wood fillers cannot secure a small screw used to hang picture frames.
In addition, please avoid using the formula for moving joints.
For example, a door hinge will not hold for long because of constant movement. As a result, the screwed part will eventually come apart.
-
How Long Before Drying Should You Drill Into the Wood Filler?
Let wood fillers dry thoroughly before drilling screws. Thus, please research how long the duration is to plan your project.
Drying times depend on the wood filler type. They also rely on how deeply you apply the product.
Generally, oil-based fillers need about ten to 20 minutes to dry. But they need 12 to 48 hours to cure completely.
-
How Can You Make Wood Filler Dry Faster?
Fortunately, we have techniques to shorten the wood filler’s drying duration. For example, apply a thin coat for the first layer as it dries more quickly.
Also, consider using multiple thin layers if you need thicker coats.
Check the weather forecast to select an appropriate working day. Then, apply the formula on warmer days.
The temperature helps the product dry quickly.
Alternatively, you can use a fan to help in air circulation. The filler dries faster with low humidity.
-
Does Wood Filler Harden Without Hardener?
A wood filler cannot harden without a hardener. Hardening happens due to chemical reactions between the product and the wood filler.
The catalyst/hardener mediates the reaction to harden the filler quickly.
Wood fillers do not harden in a reasonable time frame without the hardener.
Moreover, the resin included in the wood filler prevents the hardening reaction without a hardener.
But the resin eventually runs out, allowing the wood filler to react with atmospheric oxygen and harden.
Luckily, this process needs two to three years to complete. Therefore, your wood filler stays intact for longer.
When the resin runs out, the wood filler only sets. As a result, the surface does not dry, compromising the project’s integrity.
So, a wood filler cannot serve its purpose without a hardener.
-
Is Wood Filler Strong Enough to Screw Into?
Wood filler is strong enough to screw into, but you must consider a few things.
For instance, confirm if the product accommodates screwing. Otherwise, it will fall apart under pressure.
Fortunately, we have another formula better than petroleum and water-based, an epoxy wood filler.
Epoxy fillers come in putty or pourable liquid form.
They fill gaps, cracks, and holes and even coat wood surfaces, preventing further damage or decay.
As a result, the product is an excellent choice for repairing lumber workpieces with rot or damage.
Epoxy wood fillers offer a quick and permanent fix when repairing and strengthening furniture pieces.
In addition, they dry within 15 minutes and allow for sanding.
The paste does not shrink and delivers a robust and durable bond.
Moreover, it is water-resistant and accommodates indoor and outdoor applications. Thus, the repaired area matches well with the entire surface.
Lastly, remember the filler cannot support weighty loads. But it can perfectly hold screws.
-
Do We Have Alternative Wood Filler Types?
We have wood fillers other than petroleum-based, water-based, and epoxy products.
They include the plastic wood filler, a famous latex-based filler due to its uses.
The product is a high-quality filler, making the surface appear and act like natural lumber.
In addition, it accommodates sanding, drilling, cutting, screwing, staining, and painting.
You need a 15-minute drying time for projects with a low filler volume minutes and two to 24 hours for holes measuring a quarter inch plus.
However, you can choose any finishing element once the project dries.
Plastic wood filler is solid and durable. But it is not as sturdy as an epoxy product.
Thus, consider using an epoxy wood filler when considering the project’s maximum strength.
Besides, although epoxy wood fillers are more expensive than plastic-based ones, they are worth it!
The epoxy filler’s added strength is perfect for more significant weight support needs.
-
How Do I Drill Into Wood Filler?
Drilling into a filler is not as straightforward as it seems. You need the correct working equipment and techniques.
The materials needed for the project include screws or nails, drill, and drill bits.
Then, ensure you have the correct wood filler type. Otherwise, you may have one that is not ideal for drilling.
In addition, let the product dry thoroughly before drilling.
Epoxy fillers need at least 24 hours to cure.
However, test the area with a smaller drill bit to guarantee the desired result. Or create a pilot hole to guide the screw or nail easily.
-
Can You Use Wood Filler Over Screws?
You can apply wood filler over screws. Furthermore, using the product over fasteners works best if you intend to paint the surface.
Use a narrow-width putty knife to enjoy added control during application. Then, spread some wood filler over the hole and screw.
Also, ensure the product sits flush with the wood surface.
-
How Do I Stop Wood Fillers from Cracking?
Fortunately, you can keep wood fillers from cracking: use a solvent-based filler or more formula for deep holes.
This strategy also helps avoid shrinkage and guarantees a flush surface.
Generally, wood filler cracks because it has not dried or hardened enough.
So, the rule of thumb is to apply the product and wait for it to dry. Otherwise, rushing to the next step compromises the outcome.
The wood filler also cracks due to fewer coats, especially when handling a deep hole.
Remember, the product hardens through evaporation and shrinks. Therefore, it can take ages to set before you detect any issues.
Further, the product may not fill the hole appropriately after setting, resulting in cracks.
Conclusion
Wood filler repairs scratches, gouges, chips, and other surface blemishes on lumber.
Moreover, it fills the cracks and holes and sets on the wood: thus, maintaining lumber integrity.
However, some projects require you to screw and nail the surface after filling. Therefore, get the correct procedure in the above discussion:
Can You Screw Into Wood Filler?
Screwing into wood filler is possible. It anchors the project and ensures that it remains intact for longer.
Thankfully, we have quality wood fillers allowing you to cut, drill, varnish, sand, and paint without issues.
Also, you can go for great multi-purpose fillers for any woodworking application.

Tyron Otieno
Tyron is an avid woodworker and writer. He founded this website to help other woodworkers, whether hobbyists or professionals by sharing his knowledge and experiencie after a decade of woodworking.